


Where to buy a yukata in Tokyo
Plus, how to tie it!
Discover more of Japan with UnionPay

100 best shops in Tokyo

Most viewed
Most recent blogs

Style of the Day


Recent features / venues
- 10 things to buy for an outdoor summer
- How to dress like a Lolita girl
- Where to buy a yukata in Tokyo
- Healthy juice and smoothie bars
- Best LGBT-friendly restaurants and bars in Tokyo
- Creative Tokyo apartments
- Best late-night vintage stores in Tokyo
- Randoseru: the new It bag
- Travel Japan without leaving Tokyo
- Sakura treats for spring
Connect with us

Tsukikageya
Posted: Fri Jun 26 2015
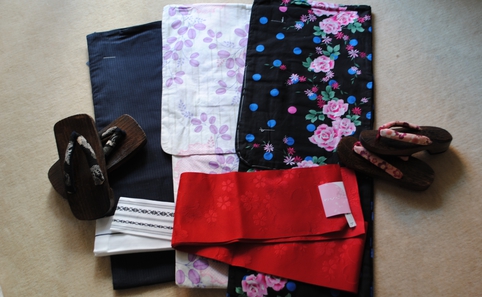
Summer in Tokyo means matsuri (festival) time, which also means yukata time! A lighter version of the kimono, yukata are worn with an ‘obi’ belt sash and optional accessories including ‘geta’ (wooden clogs), a hand fan and a small handbag. The word yukata comes from ‘yukatabira’, a bathrobe dating back to the Heian period (794-1185) that was used to dry off after bathing. This later became a common form of clothing to wear to and from the bathhouse. Nowadays, you can still wear a certain type of yukata for bath time, such as those provided at ryokan (traditional inns), but those worn at summer festivals are more elaborate with fabric designs varying from the traditional plain cross-hatch pattern to busier, more intricate ones.
In recent decades, traditional clothing such as kimono and yukata has enjoyed a revival in Japan. Aside from the wide range of yukata available at secondhand shops, department stores and specialist boutiques, there are also local designers offering spiced-up, modern creations. When it comes to pairing your yukata robe with an obi sash and other accessories, colour co-ordinating is optional, but we think it’s far more fun to mix and match different shades, textures and patterns to achieve the most dramatic effect. Here’s our list of top shops as well as a handy step-by-step guide on how to tie your yukata (it’s not as easy as it looks). All that’s left is figuring out how exactly to shuffle around on those geta.
Modern: Sou-Sou
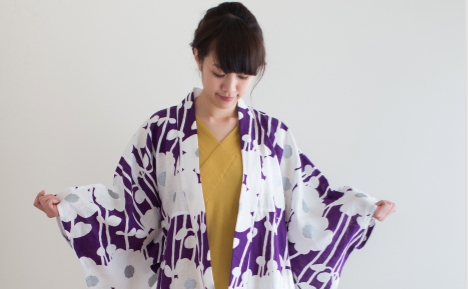
Putting a trendy twist on traditional Japanese clothing and accessories, Sou-Sou is a great place to buy gifts and souvenirs (think furoshiki wrapping cloths, hand towels and split-toe trainers based on tabi footwear). Their yukata and kimono collection is splendid, combining rich textiles, eye-catching patterns and versatile styles you can wear on a daily basis. They have a branch in San Francisco too! Map and contact details
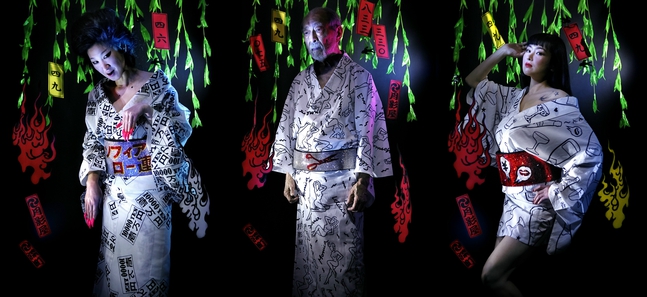
Edgy: Tsukikageya
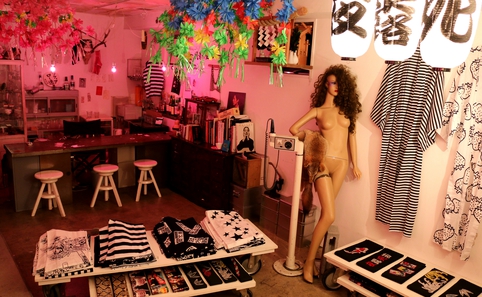
This brand is the punk rock of kimono design: it’s unconventional, groundbreaking and packing a serious attitude. Designer Natsuki Shigeta launched the line in 2001, and since then it’s been making waves on the Tokyo fashion scene. Combining traditional craftsmanship with somewhat controversial subject matter, her pieces are all sewn and dyed by hand, and priced at ¥52,929. Map and contact details
Traditional: Sakaeya
Just a short walk from Harajuku Station, Sakaeya is a family-owned shop (the CEO is a cat!) and the ideal place to start your yukata quest. You can buy a brand-new one for ¥6,000 (obi included), or spend ¥10,000 and they’ll throw in dressing assistance and a tea ceremony. You can even add hair and make-up and a photoshoot, then strut around Meiji Shrine in your outfit. Available in fits up to US size 16. They request that you make a booking before you visit; check the website for details. Contact details
Luxury: Jotaro Saito
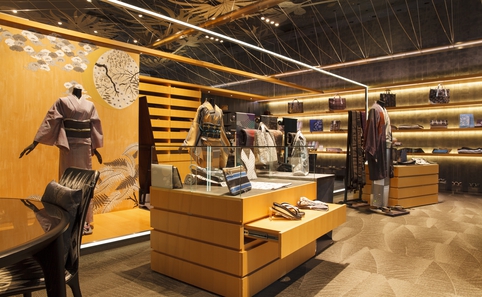
Jotaro Saito’s kimono and yukata designs have been featured on the runways for several seasons now. Each collection is futuristic and fascinating in its own way, while keeping the core elements of the traditional garment. Step things up a notch this summer with Saito’s denim kimono, complemented with sleek accessories from his online shop or posh Roppongi Hills boutique. Prices from ¥60,000 (before tax). Map and contact details
Vintage: Chicago
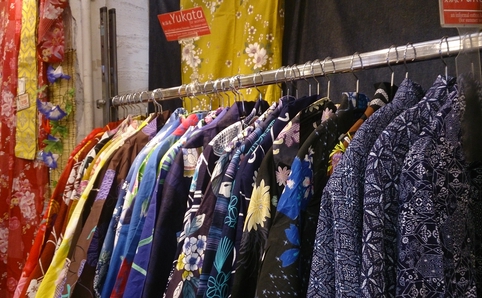
Spend hours browsing the endless rows of secondhand kimono and yukata at Chicago, a chain thrift store. The Omotesando branch has an especially large selection, and you can’t miss the neon-lit, palm tree-adorned storefront. During summer sales, some pieces are sold for as little as ¥300, so it’s a great place to stock up on festival wear (and stonewashed jeans, while you’re at it). Map and contact details
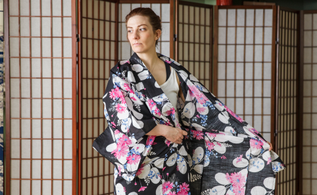
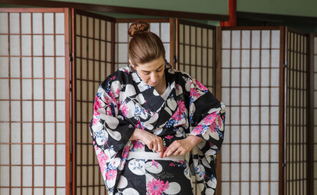
HOW TO TIE: STEP BY STEP
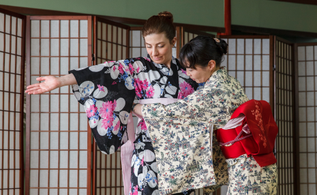
While not as complicated as assembling a kimono, wearing a yukata still takes some practice. We visited True Japan Tours, who provide one-on-one lessons, and asked them to help dress our writer, Vivian.
STEP 1
Put the yukata on. Open it with both hands, and adjust it by gathering the material up until the hemline is straight and just covering your ankles. Make sure the vertical lines on each side align with your thighs. Fold the right-hand side across your body, with your right hand touching your left hip. Then fold the left side over the top.
STEP 2
Use a thin cotton string to tie it around your waist, ensuring the hemline stays in position. Don’t worry about the excess material that bunches up around your chest. We’ll sort that out next.
STEP 3
Smooth down any excess material, front and back, over the cotton string. Use another cotton string to tie this in place just under your chest. So you should have two layers around your chest/rib area now (unless you’re very tall!).
STEP 4
Wind the obi sash twice around your body. When both ends are about the same length, tie it into a bowtie at the front.
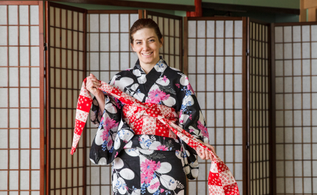
STEP 5
Turn it 180 degrees to the back and... strike a pose for the camera.

Our yukata dressing lesson took about one hour and cost ¥4,320. For an extra fee, you can add a tea ceremony to the experience. The tour group also provides a variety of other services. 4F Sasaki Bldg A 405, 2-5-7 Koishikawa, Bunkyo (Korakuen, Kasuga stations). 03 3830 0451. www.truejapantours.com. Mon-Fri 9am-6pm.
This article appears in the summer 2015 issue of Time Out Tokyo magazine
Related articles


Tweets
- About Us |
- Work for Time Out |
- Send us info |
- Advertising |
- Mobile edition |
- Terms & Conditions |
- Privacy policy |
- Contact Us
Copyright © 2014 Time Out Tokyo
Add your comment